כיצד להרשם ל מודול הקצאת מספרי חשבוניות על-ידי רשות המיסים
How to register the Open API Sandbox
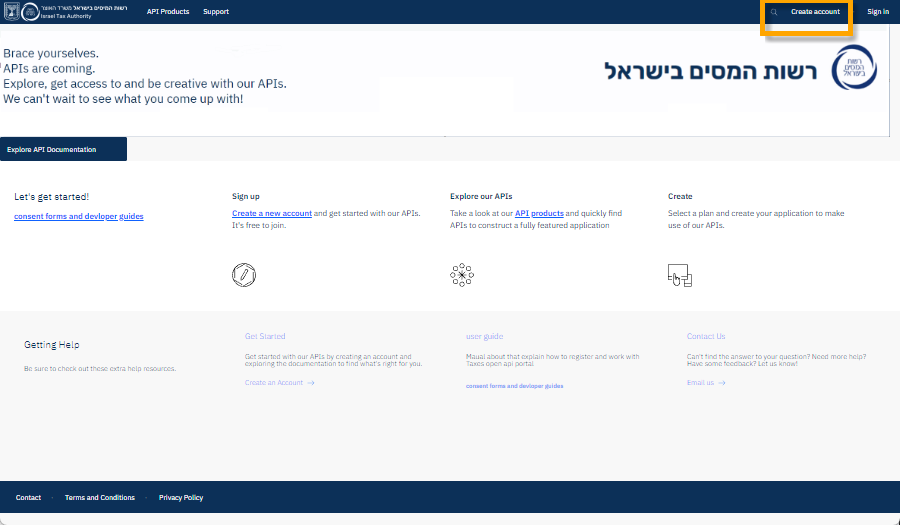
1. Register to the Israel Tax Authority site at https://openapi-portal.taxes.gov.il/sandbox/ ("Sandbox")
How to do that?
You will need to follow the business process described in OpenApiUserGuide.pdf
and נוהל חיבור בית תוכנה.
It involves creating a user account via https://secapp.taxes.gov.il/srRishum/main/openPage
What is the difference between "Persoanl Registration" ("רישום עבורי") and "Corporate Registration" ("רישום תאגידי")?
I do not know. The documentation (under רישום משתמש לרשות המסים) indicates that you need to register via "Persoanl Registration"
2. Then register to the "Sandbox". Note that the loging to the "Sandbox" is based on
the login to "Persoanl Area" ( איזור אישי ) so you MUST have a working account in Perosnal Area.
3. The registration proccess requires that
(1) You create an "Organization" in the "Sandbox";
(2) And then sign the registration forms (a contract between you and the Israeli Tax Authority).
The process is explained (in Hebrew) here.
Once you create an Organization you wil get this screen:

You now need to complete, sign and e-mail the contract.
The contract and the appendices are found here under "לקישור בתי תוכנה:"
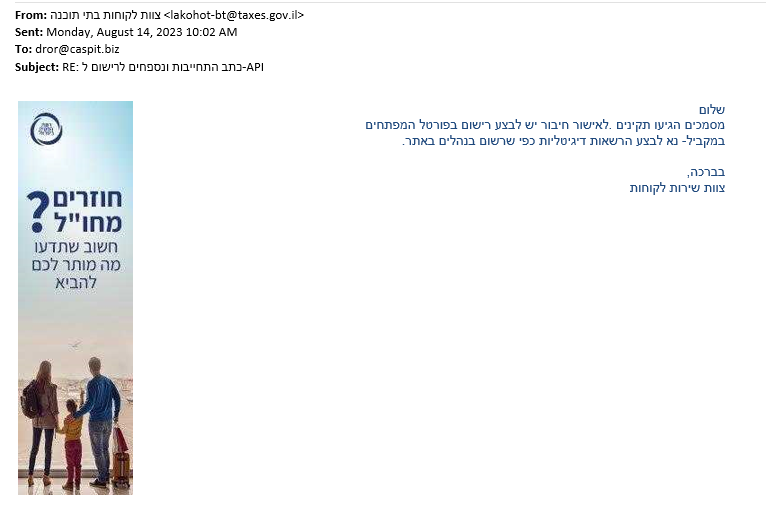
Send the contract and appendices to lakohot-bt@taxes.gov.il
If they are accepted you will receive an approval e-mail and then you will be able to log into the "Sandbox".
Here is an example for an acceptance mail:
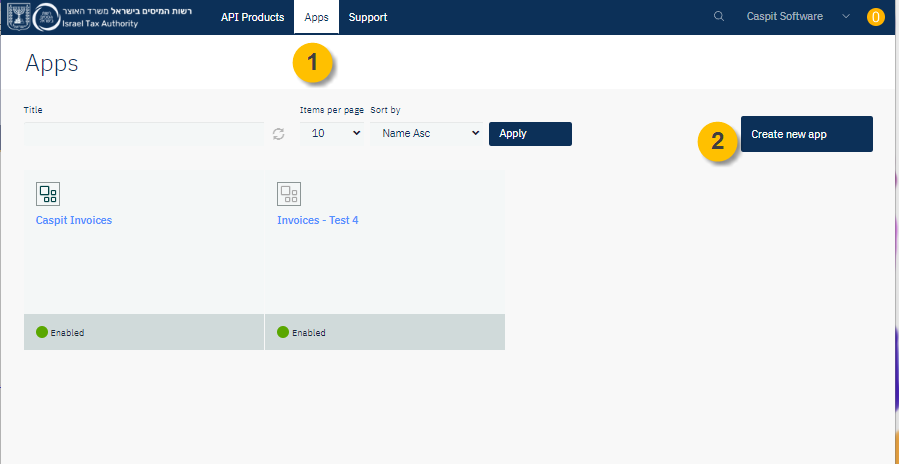
4. Once you can login to the "Sandbox" go to Apps and create an App.
Set the redirect URL to https://demo.open-api.co.il/OpenAPI
The redirect url is used at the Get Authorization Token step (demoed later).
The redirect url can be localhost since the redirect is done in the client (i.e browser).
Important! Register only ONE redirect url per one app. Technically you can add two or more redirect url's. However if
you register more than one you will get an error when you will try to use the app.
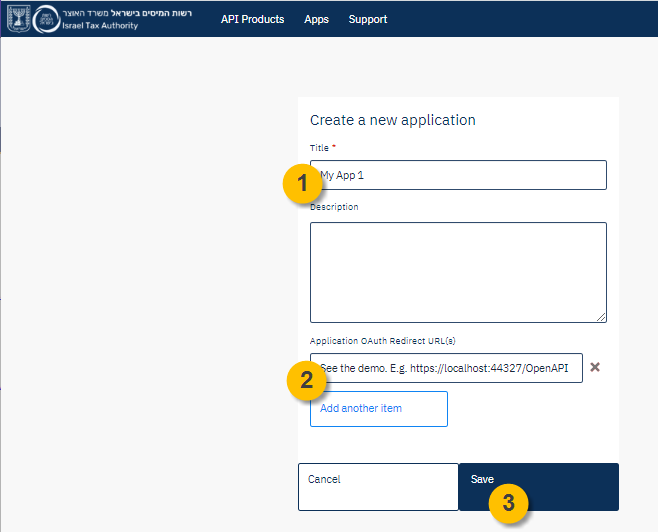
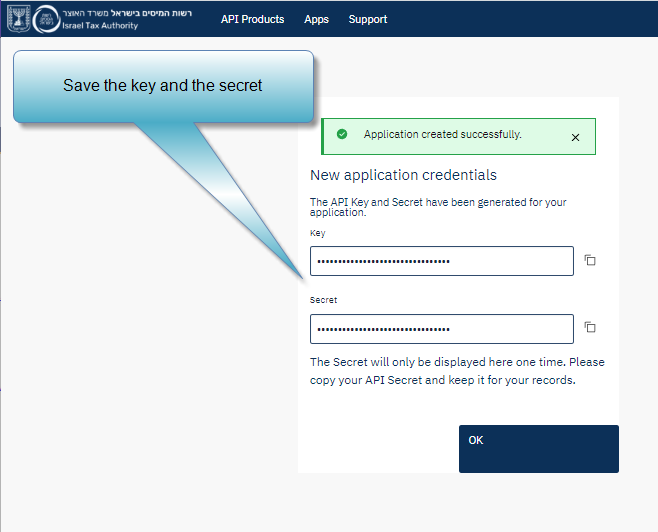
After you Save record the Key (note that it is called client_id in the Open Api) and client secret to somewhere safe.
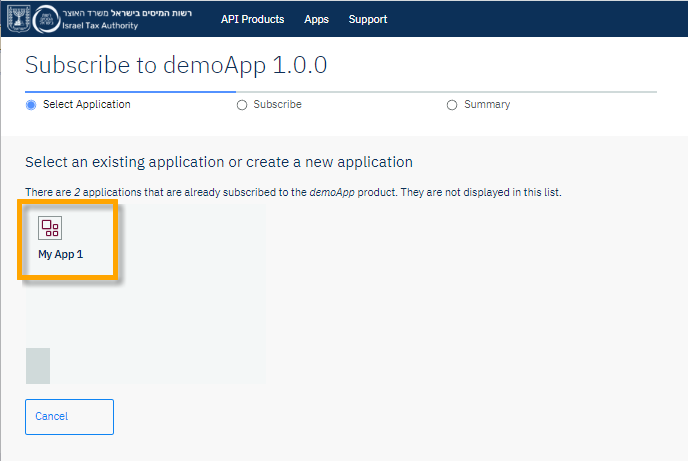
5. Subsribe the app that you just created to the "api"s that you will need:
Go the Apps tab and click on the app you created.
Ignore the Error 500 under the dashboard tab :-(
Switch to the Subscriptions tab.
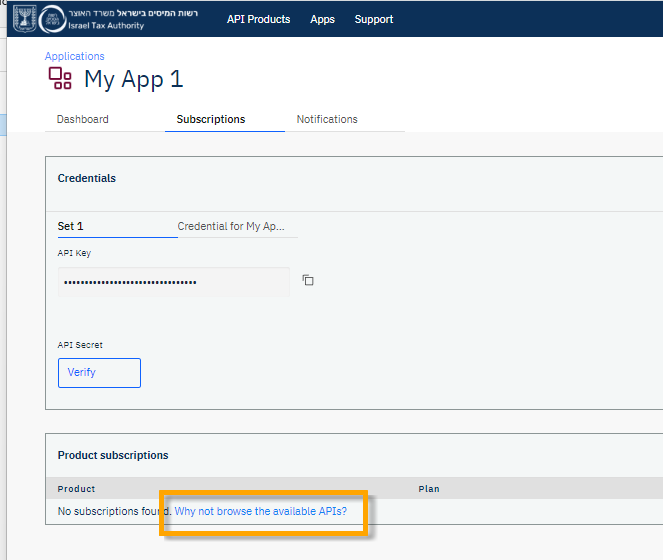
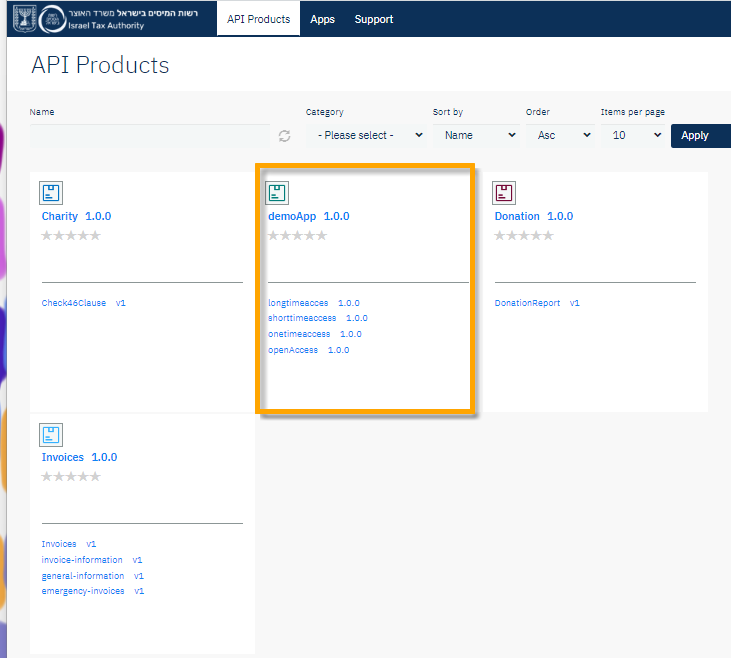
Add subscriptions to demoApp "API Product". An API Product is a set of API access points.
This specific API Produc is the API that will grant you the Access Token to the Invoices API Product.
This is NOT a "demoApp". It is a very poor name.
Click on "Select":
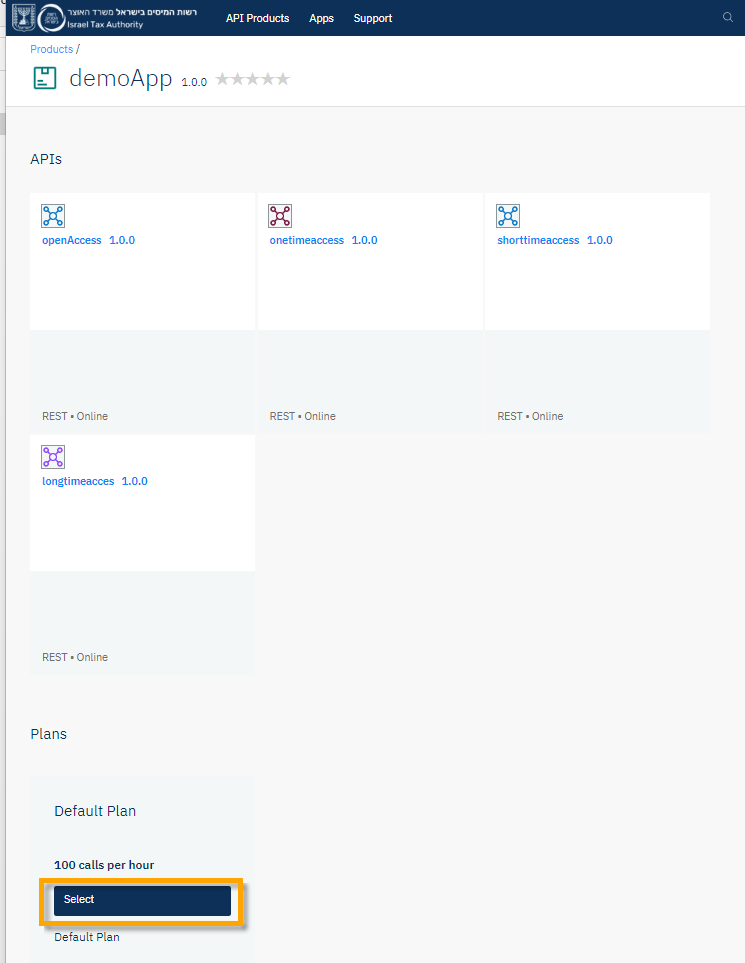
Select you app:
Click Next:
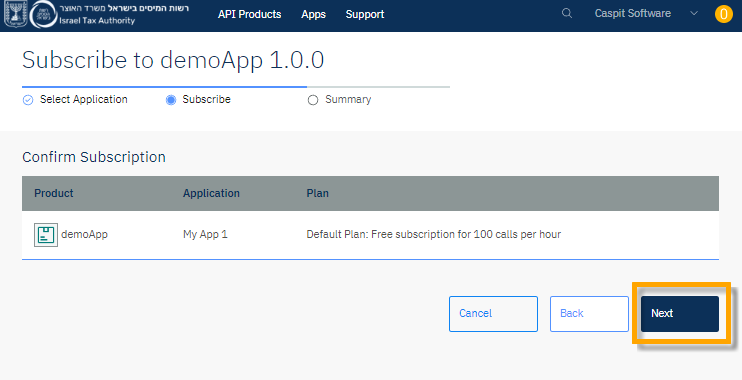
Click Done.
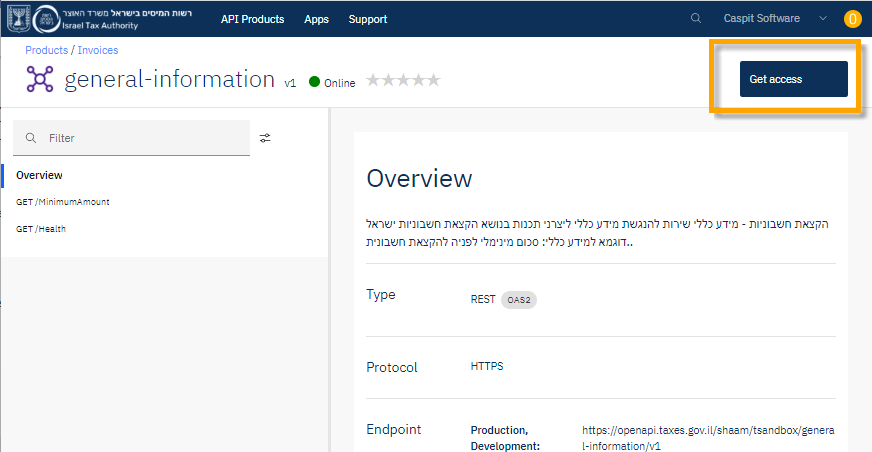
Now subscribe to the Invoices "API Product".
You may find that there is no "Why not browse the available APIs?" link. In this case subscribe via the API Products Invoices "Get Access" button:
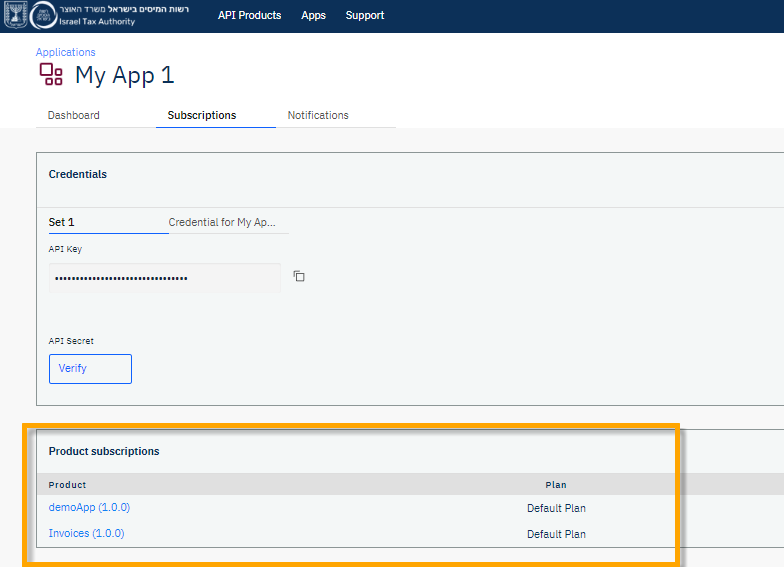
Verify the subscriptions by going to Apps, open your app, and look at the Product subscriptions list:
6. You are done here. You can now test the APIs.